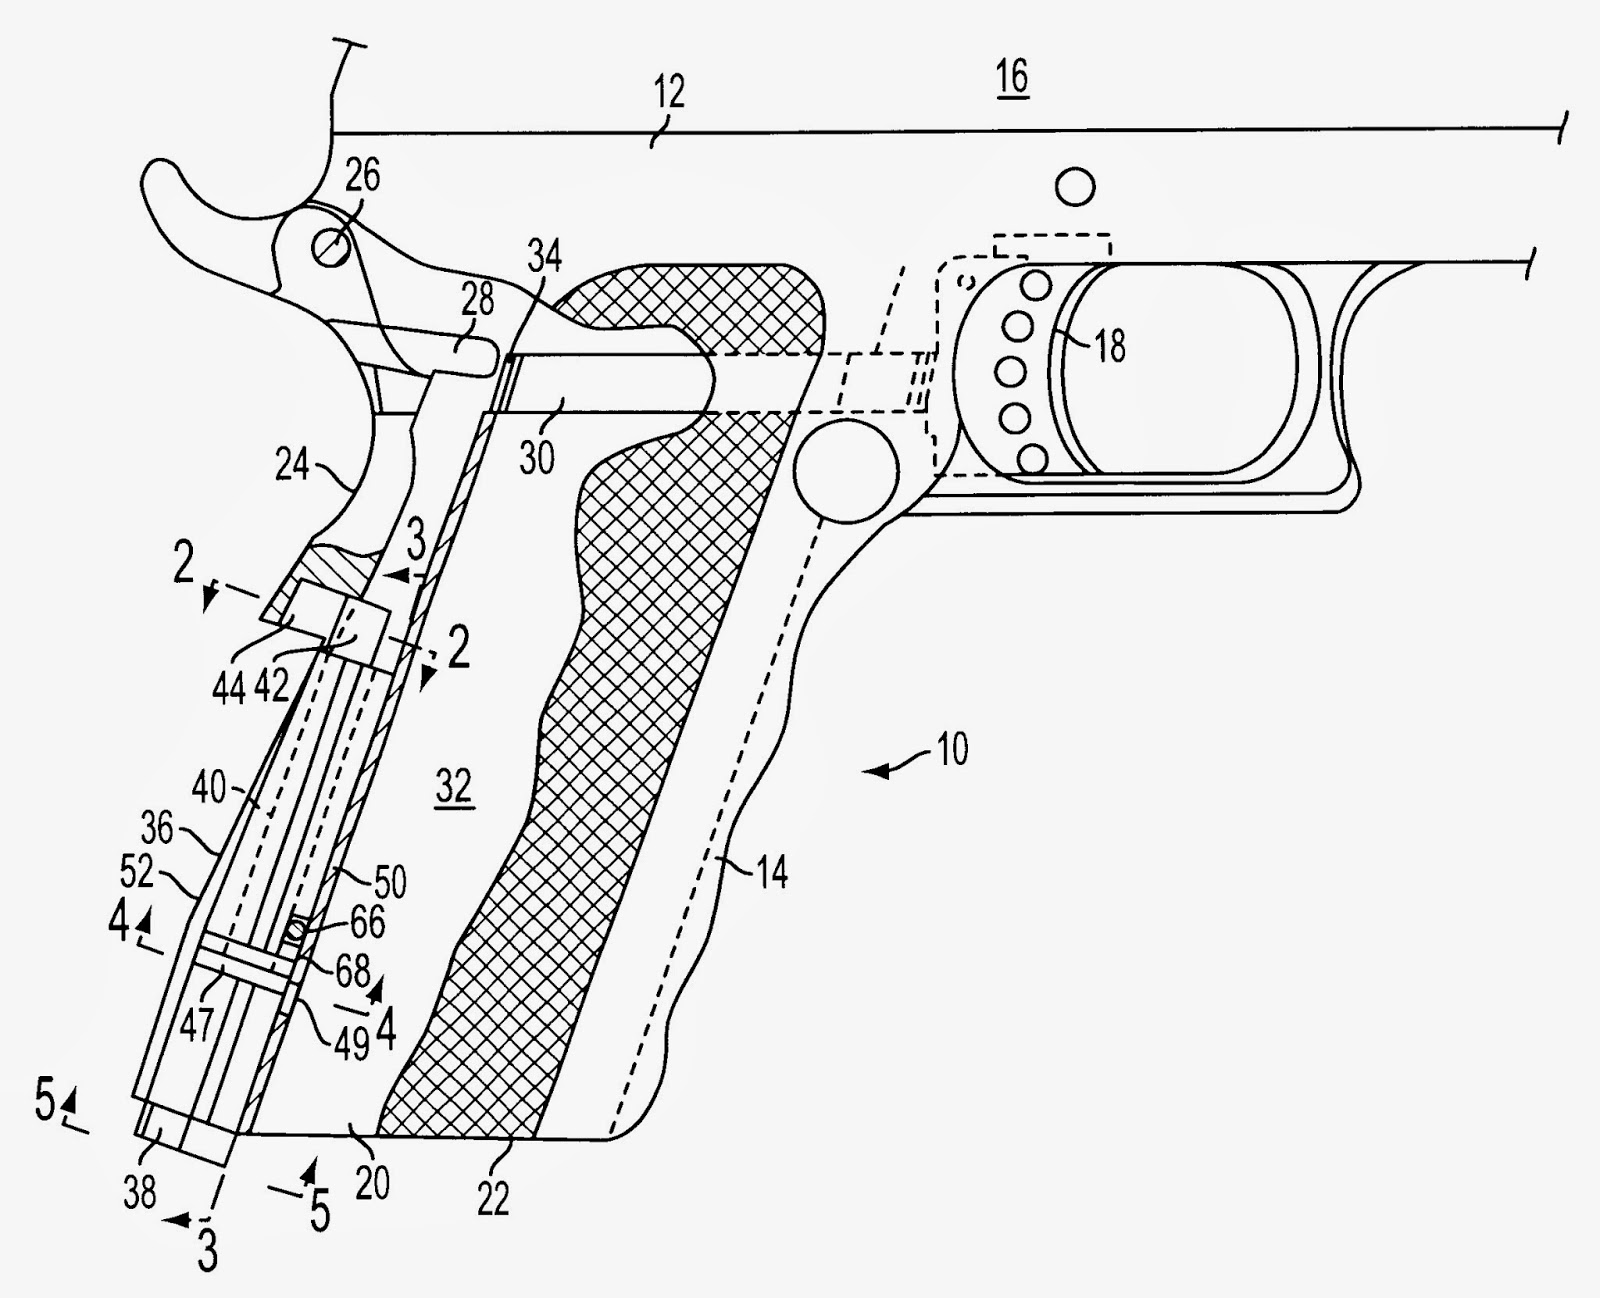
For instance: the Kimber has a beavertail grip safety. The Caspian frame spurs are GI. Only way to make the Kimber safety fit is to profile the frame spurs to match. Which would leave me with no grip safety for the Kimber frame(going to become a permanent .22 frame, remember). I could pick up a new beavertail no problem; problem is, does ANYBODY make one that doesn't have that damned speed bump on the bottom? I don't like it, and I've been told a lot of them you can't grind the damn thing off.
However, I have some 1911 parts saved over time from various things, and that includes a GI-style grip safety. Which fits right into the new frame. So I'm going to try using it; if no 'bite' problems on the hand, well, I'll just stick with it. The Kimber thumb safety would need a bit of fitting, also the magazine latch. Again, the GI parts drop right into the Caspian frame; so on they'll go. If I decide to go with the extended thumb safety, well, they're easy enough to find.
A problem with using the GI safety and the Commander-style hammer, which has a loop instead of a standard spur: the lower part of the loop contacted the safety, preventing the hammer from being able to move far enough down to come to full-cock position. So profiled the top of the safety in the appropriate area. Seems to allow normal function, though there will be several 'one round in the mag only, followed by two' tests when this is ready for the range.

I am using the Kimber trigger on this(for now), and the one sticking point there(also with the GI trigger) was that with the grip safety depressed, pull the trigger and things would stick. For those not familiar, the grip safety has an arm that, when the safety is not depressed, blocks the trigger from moving back
This morning assembled the lower(after the arm polishing), installed the upper assembly(barrel, recoil spring, slide) and worked things a bit; all seems well. Next step will be to break it back down and install the plunger tube and ejector. And yes, I'm jumpy about them; first time I've done this particular work. More will follow assuming I don't have a stroke or do something horrible and run screaming into the cold.
Here's the frame with the trigger, sear, disconnector, hammer, thumb and grip safeties, leaf spring and mainspring housing in place(the housing just enough to hold the spring in place)

*Yes, I'm doing fitting on a number of pieces. Remember, some of these pieces were originally made for a aluminum frame and I'm moving them to a steel; and some are GI standard being matched to those. Take a standard pistol and standard parts would generally drop right in and work.
No comments:
Post a Comment