"What the hell's that?"
Glad you asked. Using this schematic , you'll find #16 just above the frame

Just above it you'll see the three inside pieces: two plungers and a spring that goes in the center. One bears on the slide lock, the other on the thumb safety. The tube itself has two legs

that fit into holes in the frame; the holes are countersunk on the inside, and the ends of the legs are bored out in the center at the ends. Idea is you put the tube in place, put a channel over it(that's to come), then use a tool with a staking point to expand the ends of the legs, riveting the tube into place. Which requires the tools noted.
Yes, Brownells carries several kinds; being a dumbass, after consulting with the Wizard of Og I decided to build them. Dug around in the steel I still have and found a piece of 1/2" thick spring stock, and laid it out like so:
(picture to come)
Then put a new blade in the hacksaw and started cutting. No pictures of a lot of this, as between general dirt and cutting oil my hands were too dirty to hold the camera, so written description only:
Make two cuts for the center slot, about 7/8" long.
Make two cuts at the top, to take out a notch for where the bolt will go.
Figuring on using a 8x32 setscrew for the point, used a #29 bit in the drill press to drill all the way through.
Use a 5/8" drill bit to make a hole between the ends of the cuts. Had I been smart enough, I'd have drilled the hole and THEN laid out the cutting lines and cut. Either way, that removes the center piece.
On the top section, use a #7 drill to open up the hole.
Tap that hole 1/4x20.
Tap the bottom hole 8x32.
That makes the body of the press.


You'll notice one side of the bottom leg is relieved a lot:

There's a piece you need to go with this: rectangular piece with a channel cut on one side, it fits over the tube to hold it in place and prevent it being crushed by the press. Used some of the same spring stock for this, and have some pictures:
Mark the width of the channel.
Make two cuts about 2/10" deep.

Then used a big metal-cutting wheel in the Dremel to hog out what was left,

Kept measuring depth with the caliper to keep the slot even in depth(fairly); actually made it a bit deep.
Mark the cutoff line and cut the piece off from the stock.
Then squared and leveled* the back where the bolt will bear. Then ground the slot side to level the legs and get the proper depth, then used the file again to get the slot level along the entire length.
Used a 1/4" bit to make two, call them countersinks, on the back;
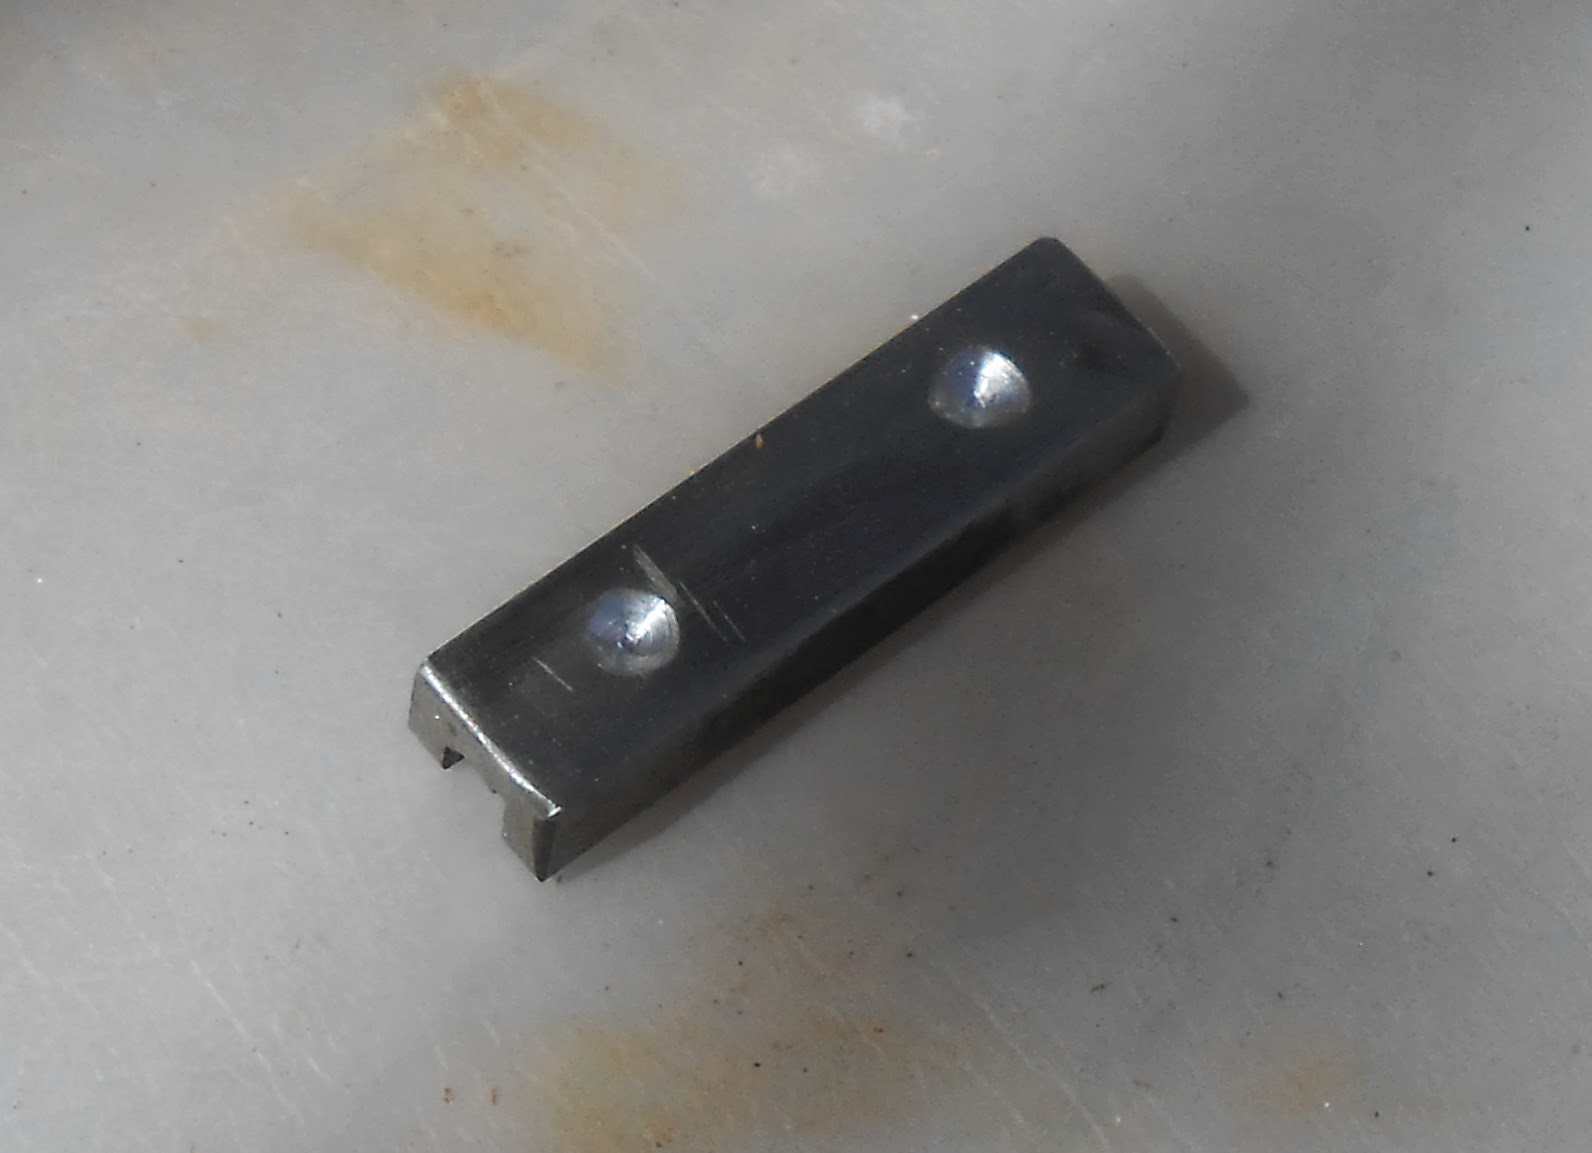
the rounded end of the bolt will fit so it won't slip.
Put both pieces on the sander to clean up all sides and round the corners, and that's it.

I'll do some more cleanup later, either blue or parkerize them(might as well, they ought to last forever.
And no, not jumping right to installing the tube; something to do first. That's the next installment.
1 comment:
Sweet metal working there better than a bought tool anyways good job!
Post a Comment