You can get 7.62 Nagant brass from Starline or you can use the Lee dies to form .32-20 brass to work; in both the case is too short to form the gas seal. It works quite well, and the brass lasts longer since it's not being as drastically worked when you fire. If you want the full-length cases, the only two you can buy that I know of are Fiocchi(two drawbacks, it's expensive and due to the dramatic crimp they use it tends to crack at the mouth when fired) and the Russian target ammo some dealers carry(very accurate, generally doesn't crack but berdan primed). Which leaves the option of taking some existing case and forming it.
At the time I got my Nagant I found a post on a gunboard on how to do this and decided to give it a try. Some success, some failure and some bugs in the process as I tried it. Fiddled with it on and off, and here's how I've been doing it.
Needed: .223 cases, a GOOD case lube, a .30 Carbine sizing die, a short piece of brass rod about
1/4" diameter and a drill press. Also some way to cut the excess off when the time comes. Done right this gives you a case with a rim to hold it in place and long enough to give the gas seal.
My procedure
I start off by chucking a case in the drill press with about 1/2" sticking down. Start it turning at low rpm and use a file, flat side vertical, held against the case with the bottom edge in the extractor groove.
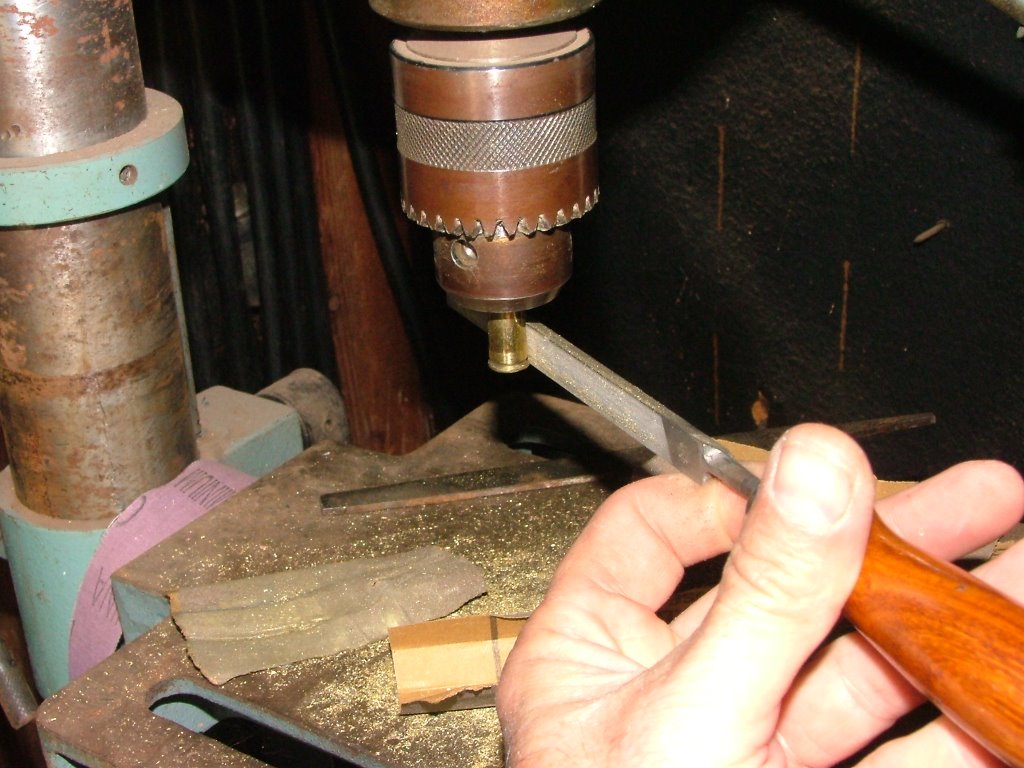
I haven't tried to measure how much to take off; the ideal here would be a small lathe where you could repeatedly shave off an exact amount. But until I have/have access to a lathe, drill press it is. I take a bit off, then use some fine sandpaper to smooth the cut area. Do a handful, then wipe them off and head to the loading press.
Put in the appropriate shellholder and run the die down until it touches the holder and lock it. Lube a case(I've been using Imperial Sizing Die Wax) and run it up into the die, just a little; when it wants to stop, stop and back it out. Wipe on more lube, run it up again till it gets tight, pull out and relube. If you've taken enough off the case at the drill press you should be able to run the case almost all the way up in three tries, if not it'll need four or
five. I STRONGLY suggest you rotate the case a bit each time, as if you don't you'll wind up either bending or cracking the rim, and you need it in place
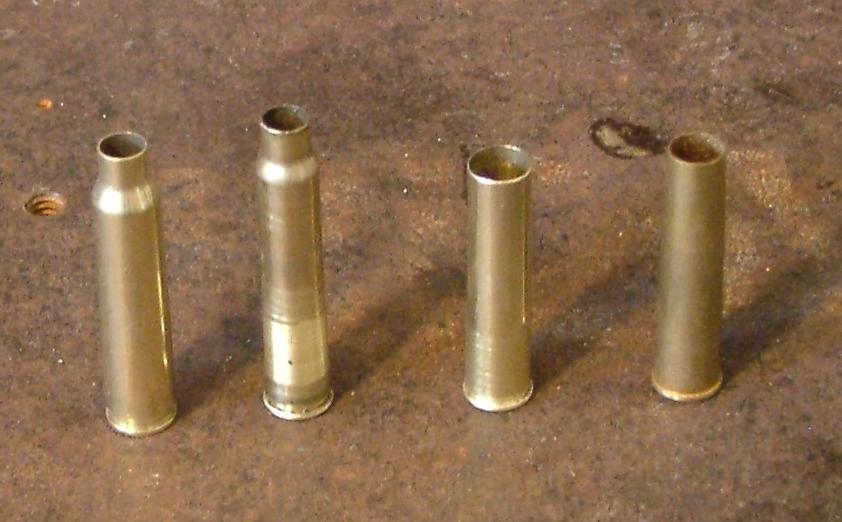
If you did it just right at the first step, inspection will show no raised area and you can do the final forming. Most of the time I didn't take off enough(lathe would probably solve that) and the die will form a lip or rim on the case from brass being pushed down. Here's an original case, and one at this point of the forming:
You can see the belt formed a little above the extractor groove and the sized case is longer.
So when the whole bunch is at this point, take them back to the drill press and use the file to cut off that lip, then sand smooth. At this point you can trim the cases. You can use a jewelers saw or whatever, I usually use the sanding disc on my belt sander to cut them back to the start of the shoulder; they need to be at least 1.5" overall after cutting, then use a deburring tool to clean up the edges. Clean the cases off and back to the press.
Here you'll need a flat piece of steel, only specs are that it be thick enough not to bend and wide enough to cover the shellholder. Take the depriming stem out of the die- you may want to use a universal deprimer to do that and just leave the stem out of the sizer- set the steel on the shellholder, lube the case and push it up into the die,
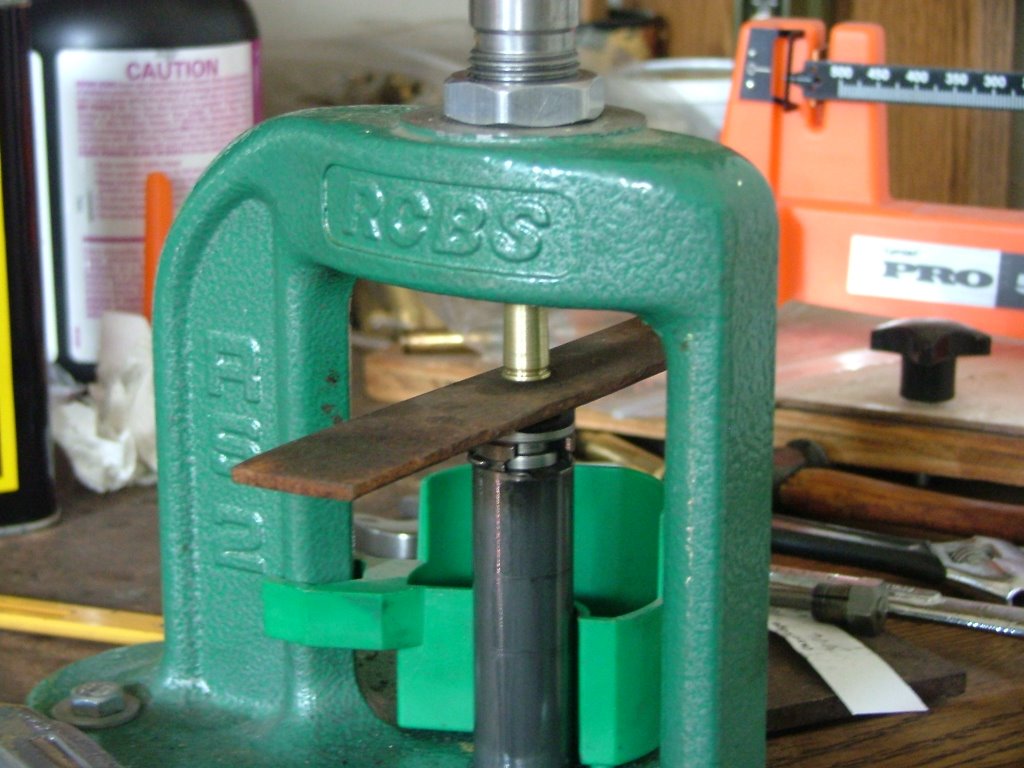
then run the ram up until it contacts, then lever it all the way; it'll take some pressure and the rim should be the only thing showing below the die mouth. Back off the ram, stick the brass rod through the depriming stem hole into the case, take a light hammer and start tapping. Hit too hard and you can crack the shellhead or break it off, so just tap and if you lubed the case well it should start coming out after a few.
Examine them at this point, look for any cracked rims or other damage that means toss it. If all's well, get out the case trimmer and trim them to 1.5" overall. Depending on the case and how far back you cut it off, you may have to use the expander die to open the mouth up a bit so the trimmer guide will fit in. Then deburr inside & out, clean off the lube and you have cases ready to use. Don't forget: you will need a way to bell the case mouth a bit to let the bullet start in.
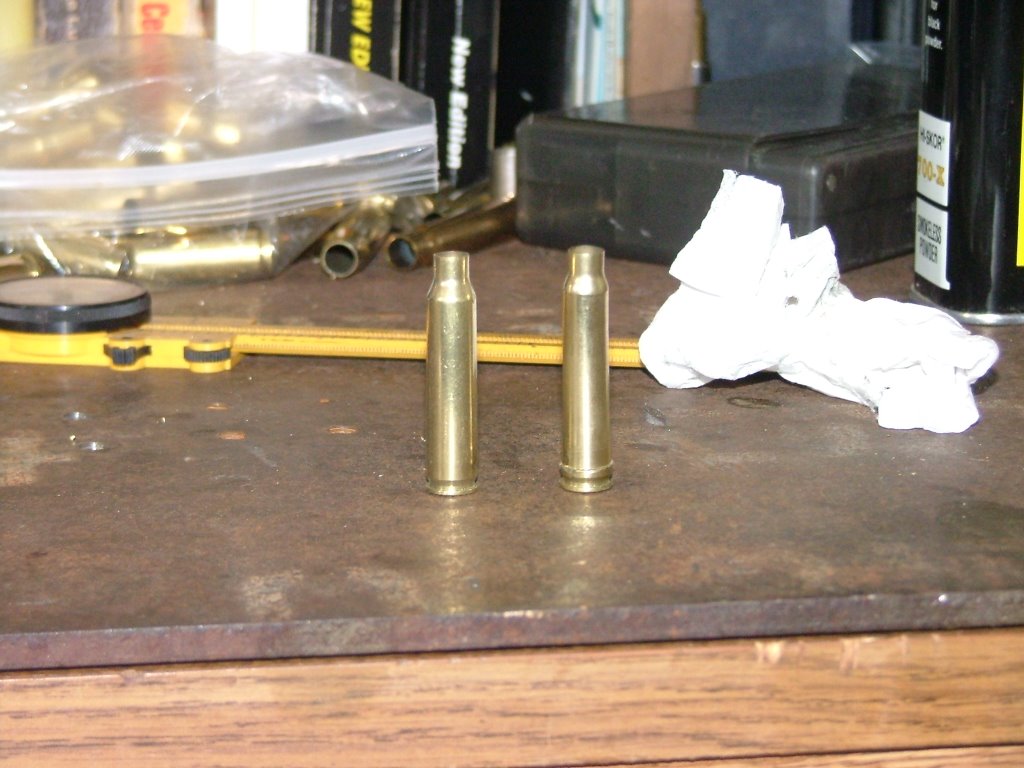
Here's a .223 case, one with all the forming done, trimmed to length and one of the Russian target cartridges on the right. Hard to see in this shot but the Russian has a long taper crimp above the bullet(which is a wadcutter seated with the face almost .4" below the case mouth).
I loaded 25 of these reformed cases with standard small pistol primers, a charge of Unique and some 100 grain Hornady hollow-base wadcutters, seating the bullets so the face is about 1/4" below the case mouth. Then I ran them partway into the sizing die to give the case a taper crimp and smooth out any bulges formed when you seated the bullet. Later on, just for the hell of it, I've got some .30 caliber hollowpoints I'm going to try out in these.
That first 25 I tried out at about ten yards, and all fired with no problems, no split case mouths and good accuracy(good for me with those sights; results may vary). Some empties fell right out, some were pretty sticky; I think a combination of not smooth enough where they'd been filed down and maybe a bit too thick there. The Russian brass looks like it's pretty thin-walled, the .223 much thicker so I think it didn't contract back as much after firing. I'm going to thin the cases that stuck just a bit at/above the web and polish them and see how that works out.
Notes
When my old pc crapped out, I lost the information I'd originally saved on this procedure including an e-mail I got from the guy who posted it. If you happen to see this, thanks for helping me work this out.
Most dies will not have a seating stem long enough to push the bullet this deep. You'll have to make a longer stem; I took another die(I used a .30-30) and used a long piece of threaded rod for a stem to seat it. Doing this, you have to make damn sure the bullet is started straight for it to continue straight in. Update: since I wrote this, I tried something: I took unscrewed the top from the seating die and put in a spacer, about .4" long above the seating stem. That allows the Lee die to set the bullet down below the case mouth in full-length cases.
I found that commercial cases were a lot easier to work than military; the mil cases have thicker walls.
I tried annealing some cases to see if that would help in forming them; it didn't.
I had several cases crack at the mouth the second time I expanded them for loading, so I got out the torch and annealed the case mouth area on all. I've got a dozen more ready to trim to length, after that I'll anneal them before expanding the first time. There's a lot of forming done and it's work-hardening the brass; hopefully annealing them at this stage will help them last longer.
Additional: Just found this thread over at The High Road on this very subject, some good information there.
No comments:
Post a Comment