I'm starting off with some flat bar stock, from what I can tell W2, a water-hardening tool steel of fairly simple alloy. Don't let the 'water-hardening' fool you; in a piece like this, or any other thin section, use a light quenching oil, preferably heated to around 100 F. If you quench a thin section in water, it's quite likely to crack.
First, bring the few inches for the blade up to heat

Then hammer it into a point tapered toward one edge. Remember that when you hammer on the edge it not only tapers it, it spreads it wider, so you'll have to make a few strokes on the side to keep the thickness even.
Reason for 'toward one edge' is that when you hammer in the bevels from the back to the edge, the edge side will be stretching- a lot in many cases- so you both taper toward one edge, and then bend it toward the edge side

When you start hammering, you'll be placing the edge section along one edge of the anvil and striking with the hammer face at an angle, starting at the back end of the blade and working forward. You're spreading the steel so it'll be thinner at the edge, and if you don't have it at the edge of the face you'll be banging the hammer and anvil faces up.

Start at the rear, and it'll straighten as you work forward
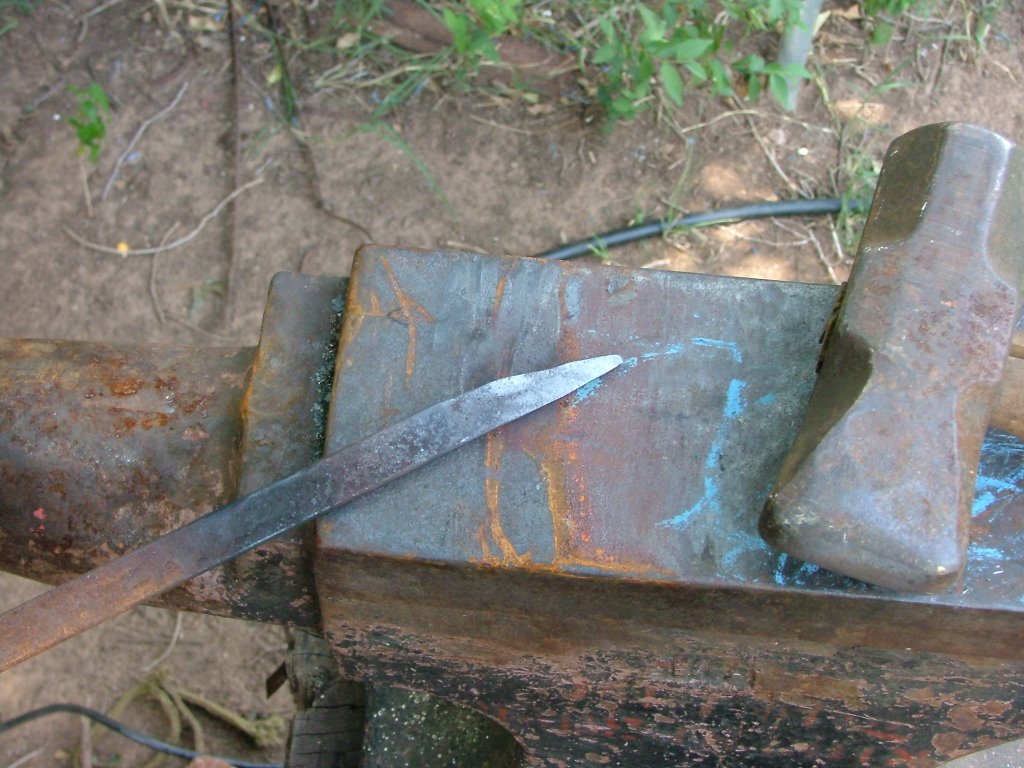
This is after working one side. The blade is mostly straight and the bevel from back to edge is visible.
Next heat, it'll be worked on the opposite edge of the anvil to shape the other bevel

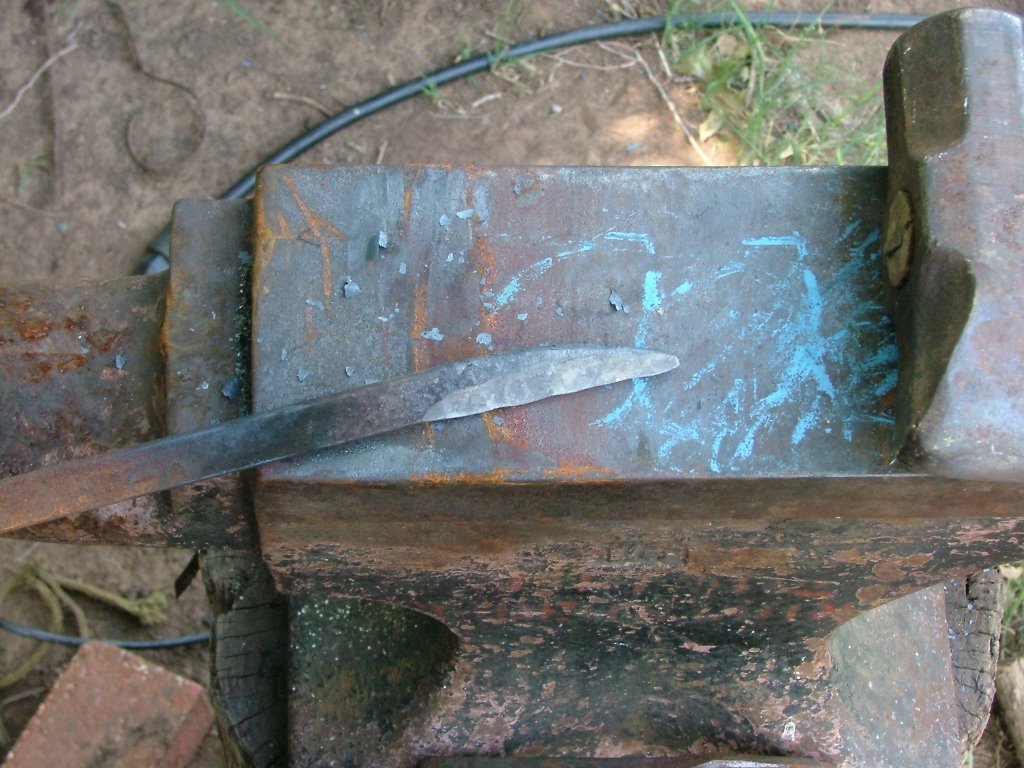
Here's the piece now. The bevels are formed, the blade is rough-shaped in profile and length. You can do some more hammer work to refine the shape a bit and- very important- make sure the edge is straight and centered; if it's crooked or off-center, NOW is the time to take care of that.
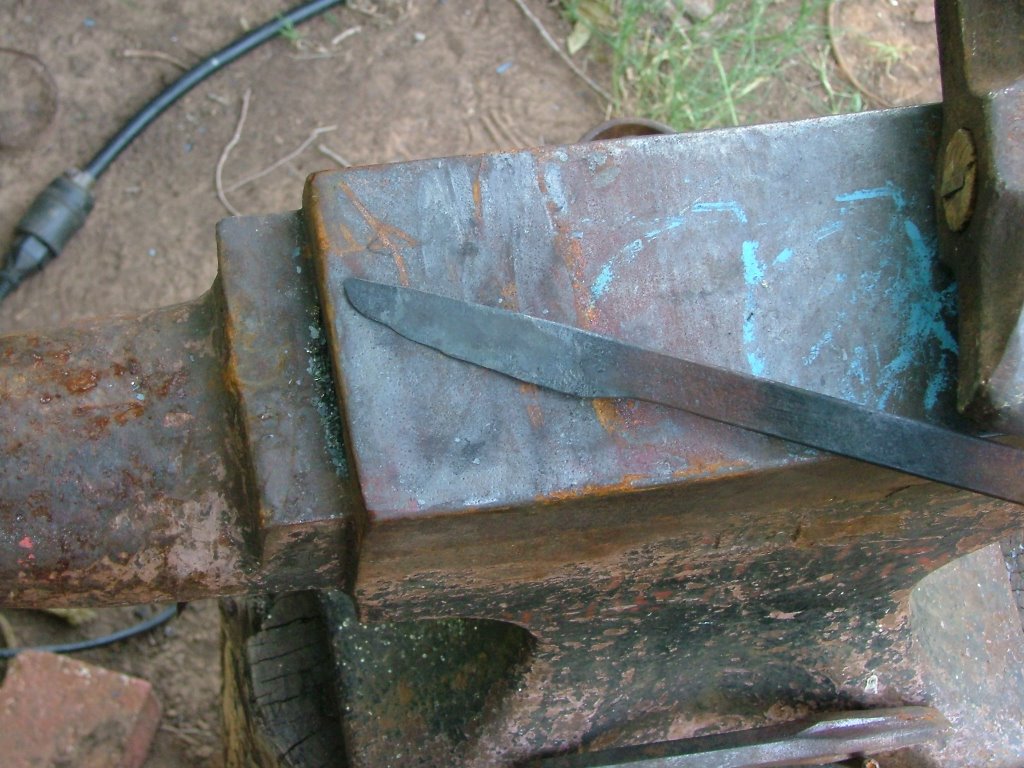
This piece is going to have a full tang, meaning the full length and width of the grip section; in this case it'll be drilled and the wood, stag or whatever will be pinned and glued in place. First I bring it up to heat, then, at the back of the blade, hammer it over the edge of the anvil to form the front of the tang

Then figure out how much stock you'll need to shape the tang and cut it off. If in doubt, cut it too long; you can always trim it. I usually bring it up to heat and cut it on the cutoff hardy, basically a chisel with a tang that fits into the square hardy hole; lay it on the edge and hit a couple of strokes, then use tongs to break it off at that point.

leaving this

Now, to lengthen the tang I heat it and use the peen side of a straight-peen hammer. By striking with this face, you stretch it lengthwise while getting minimal spread in width.
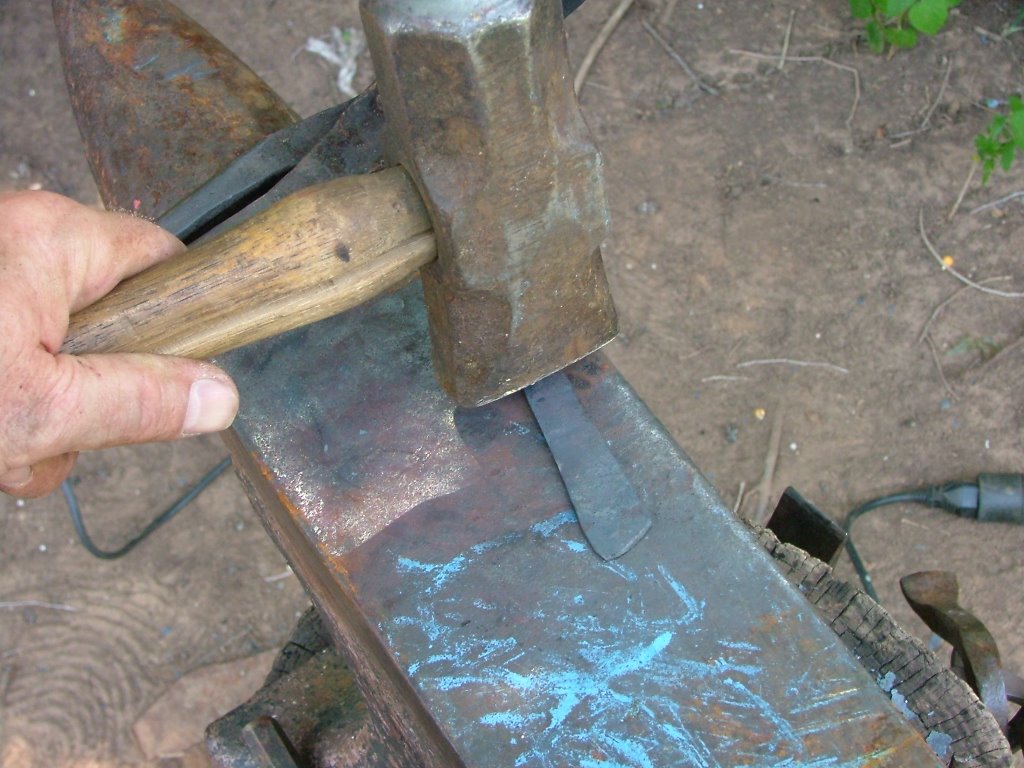
After working down one side, work down the other. You'll have to also work the edges a bit to keep them at the width you want. And watch how much you use the peen; it's possible to wind up with the tang thinner than you want. Plan on it being the fullest thickness where tang meets blade, tapering thinner from there.
At this point you'll need to watch the back to make sure it doesn't wind up with some odd curve or bulge you don't want; the overall straightness; make sure the edge is still centered. It's possible to do virtually all of the shaping on the anvil, leaving just a slight bit of grinding or filing to clean up the profile, then heat-treat it. If you want shiny sides and smooth lines, you'll want to plan on making the blade a little oversize. Then you can grind the profile clean, and it'll be thick enough that you can grind off the hammer/forge marks.
How much grinding to clean up the sides depends almost entirely on how carefully you work. One thing that makes a big difference is to hit the piece with a wire brush when you take it out of the fire, a few strokes on both sides to get rid of scale. You can put a little water on the anvil face and dip the hammer face, then take the piece straight from the fire to the anvil and hammer. It's messy, the first stroke or two can get very loud 'bangs' from trapped water flashing to steam when you strike, but it works very well. And remember, the more even your hammer strokes, the better the finish will be when the forging is done.
When doing the last work on it, keep the heat to a low red, and after the hammering is done and all is as you wish it, put it in the fire and bring it up to a low red heat, over as much of the length and as even as possible, then bring it out and let it cool. This is not annealing; that requires bringing it to heat and cooling it as slowly as possible to make it as soft as possible. This is normalizing, evening out the stresses in the piece. A lot of makers do anneal here, putting the hot blade into a can of pre-heated ash or something that will hold in heat. You make your choice of which to do.
Which leaves you with this:

Forged, normalized and ready to grind or file to profile, to clean up the edge bevels and flatten the tang. When I get a chance to do this I'll post pictures of that.
No comments:
Post a Comment